

 English
 Français
 Italiano
 Deutsch
 Español
 Русский
 Čeština
 Türkçe
 Português (Brasil)
 한국어
한국어 简体中文
简体中文 正體中文
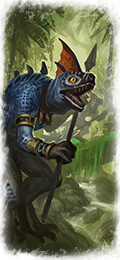
正體中文Kohorta Skinków z oszczepami
Te skinki rzucają oszczepami wystarczająco celnie, by spowolnić szarżę przeciwnika.Skinki są szybkie i niespokojne. Różnią się pod tym względem od pozostałych jaszczuroludzi, których cechuje ociężałość. Stanowią one ogromną siłę roboczą, stworzoną przez Starożytnych do pełnienia wielu różnych ról. Bez skinków społeczność jaszczuroludzi szybko by upadła. Istoty te potrafią dzierżyć broń. Robią to zarówno podczas licznych patroli, jak i w czasie wojny. Jako żołnierze, skinki mogą być bezmyślne i zuchwałe; mogą też nagle wpadać w panikę. Ich niespokojna natura oznacza, że znacznie łatwiej rozbijają swoje jednostki niż opanowane saurusy. Zazwyczaj skinki ruszają przed główną armią i spowalniają postępy wroga, nękając go gradem strzałek. Gdy zmasuje się je w kohorcie, mogą one wzmocnić linię bojową jaszczuroludzi. Salwy oszczepów i strzałek uwalnianych przez skinki są zaskakująco niebezpieczne, a to dlatego, że wojownicy ci, nauczyli się pokrywać swoją broń zabójczymi toksynami pozyskiwanymi z jadowitych płazów i owadów, które występują obficie w parnych dżunglach i na bogatych bagnach Lustrii.
 |
Unit Name Kohorta Skinków z oszczepami |
Main Unit Key wh2_main_lzd_inf_skink_cohort_1 |
Land Unit Key wh2_main_lzd_inf_skink_cohort_1 |
Naval Unit Key wh_main_shp_transport |
Land Unit Group |
Naval Unit Group |
Soldiers 160 |
Caste Piechota dystansowa |
Category Piechota dystansowa |
Class Piechota dystansowa |
Koszt 400 |
Koszt werbunku 400 |
Koszt utrzymania 100 |
Missile Damage 16 |
├ Missile Weapon wh2_main_lzd_javelin |
├ Projectile wh2_main_lzd_javelin |
├ Missile Damage 12 |
├ Missile Ap Damage 4 |
└ Base Reload Time 10 |
Accuracy 10 |
Range 80 |
Reload 10 |
Shots Per Minute 6.7 |
Ammunition 3 |
Melee Attack 20 |
Weapon Strength (Weapon Damage) 25 |
├ Melee Weapon wh2_main_lzd_skink_club |
├ Melee Damage Base 20 |
├ Melee Damage Ap 5 |
├ Armour Piercing No |
├ Bonus vs Cavalry 0 |
├ Bonus vs Elephants 0 |
└ Bonus vs Infantry 0 |
Charge Bonus 10 |
Melee Defence 24 |
├ Base Defence 24 |
├ Shield wh_missile_block_35_wood |
└ Shield Defence 0 |
Armour 65 |
├ Armour wh2_main_body_30 |
├ Armour Defence 30 |
└ Shield Armour 35 |
Health 50 |
├ Man Entity wh2_main_lzd_inf_skink_blood_dismembers |
├ Man Speed 46 |
├ Man Health 8 |
└ Bonus Hit Points 42 |
Leadership (Base Morale) 55 |
Umiejętności
No Ability
Attributes
- Ukrycie (las)
Ta jednostka może ukrywać się w lesie, dopóki wróg nie podejdzie zbyt blisko.
Wady i zalety
- Tarcza
Tarcze mogą blokować strzały, bełty, pociski z karabinów i podobnej broni, ale wyłącznie z przodu. - Zatrute ataki
Zatrute ataki tej jednostki zmniejszają prędkość celu i zadawane przezeń obrażenia. - Wodniak
Niektóre jednostki mają problemy z poruszaniem się i walką na płyciznach, ale jednostki wodniackie radzą sobie na nich wyśmienicie.
| Wymaga Budynki | |
|---|---|
|
Zajęta piramida Nagasha (społeczność jaszczuroludzi)
(wh2_dlc09_special_settlement_pyramid_of_nagash_lzd_1) Level 1
Zajęta piramida Nagasha (plac zgromadzeń jaszczuroludzi)
(wh2_dlc09_special_settlement_pyramid_of_nagash_lzd_2) Level 2
Zajęta piramida Nagasha (święty ziggurat)
(wh2_dlc09_special_settlement_pyramid_of_nagash_lzd_3) Level 3
Zajęta piramida Nagasha (miasto-świątynia)
(wh2_dlc09_special_settlement_pyramid_of_nagash_lzd_4) Level 4
Zajęta piramida Nagasha (cytadela-świątynia)
(wh2_dlc09_special_settlement_pyramid_of_nagash_lzd_5) Level 5
Komora lęgowa niższych kast
(wh2_dlc13_horde_lizardmen_skinks_1) Level 0
Komora lęgowa odważnych
(wh2_dlc13_horde_lizardmen_skinks_2) Level 1
Komora lęgowa Wybrańców
(wh2_dlc13_horde_lizardmen_skinks_3) Level 2
Zajęte Massif Orcal (poziom 1.)
(wh2_dlc15_special_settlement_massif_orcal_lzd_1) Level 1
Zajęte Massif Orcal (poziom 1.)
(wh2_dlc15_special_settlement_massif_orcal_lzd_1) Level 1
Zajęte Massif Orcal (poziom 1.)
(wh2_dlc15_special_settlement_massif_orcal_lzd_1) Level 1
Zajęte Massif Orcal (poziom 1.)
(wh2_dlc15_special_settlement_massif_orcal_lzd_1) Level 1
Zajęte Massif Orcal (poziom 2.)
(wh2_dlc15_special_settlement_massif_orcal_lzd_2) Level 2
Zajęte Massif Orcal (poziom 2.)
(wh2_dlc15_special_settlement_massif_orcal_lzd_2) Level 2
Zajęte Massif Orcal (poziom 2.)
(wh2_dlc15_special_settlement_massif_orcal_lzd_2) Level 2
Zajęte Massif Orcal (poziom 2.)
(wh2_dlc15_special_settlement_massif_orcal_lzd_2) Level 2
Zajęte Massif Orcal (poziom 3.)
(wh2_dlc15_special_settlement_massif_orcal_lzd_3) Level 3
Zajęte Massif Orcal (poziom 3.)
(wh2_dlc15_special_settlement_massif_orcal_lzd_3) Level 3
Zajęte Massif Orcal (poziom 3.)
(wh2_dlc15_special_settlement_massif_orcal_lzd_3) Level 3
Zajęte Massif Orcal (poziom 3.)
(wh2_dlc15_special_settlement_massif_orcal_lzd_3) Level 3
Zajęte Massif Orcal (poziom 4.)
(wh2_dlc15_special_settlement_massif_orcal_lzd_4) Level 4
Zajęte Massif Orcal (poziom 4.)
(wh2_dlc15_special_settlement_massif_orcal_lzd_4) Level 4
Zajęte Massif Orcal (poziom 4.)
(wh2_dlc15_special_settlement_massif_orcal_lzd_4) Level 4
Zajęte Massif Orcal (poziom 4.)
(wh2_dlc15_special_settlement_massif_orcal_lzd_4) Level 4
Zajęte Massif Orcal (poziom 5.)
(wh2_dlc15_special_settlement_massif_orcal_lzd_5) Level 5
Zajęte Massif Orcal (poziom 5.)
(wh2_dlc15_special_settlement_massif_orcal_lzd_5) Level 5
Zajęte Massif Orcal (poziom 5.)
(wh2_dlc15_special_settlement_massif_orcal_lzd_5) Level 5
Zajęte Massif Orcal (poziom 5.)
(wh2_dlc15_special_settlement_massif_orcal_lzd_5) Level 5
Zajęte Tor Yvresse (poziom 1.)
(wh2_dlc15_special_settlement_tor_yvresse_lzd_1) Level 1
Zajęte Tor Yvresse (poziom 1.)
(wh2_dlc15_special_settlement_tor_yvresse_lzd_1) Level 1
Zajęte Tor Yvresse (poziom 2.)
(wh2_dlc15_special_settlement_tor_yvresse_lzd_2) Level 2
Zajęte Tor Yvresse (poziom 2.)
(wh2_dlc15_special_settlement_tor_yvresse_lzd_2) Level 2
Zajęte Tor Yvresse (poziom 3.)
(wh2_dlc15_special_settlement_tor_yvresse_lzd_3) Level 3
Zajęte Tor Yvresse (poziom 3.)
(wh2_dlc15_special_settlement_tor_yvresse_lzd_3) Level 3
Zajęte Tor Yvresse (poziom 4.)
(wh2_dlc15_special_settlement_tor_yvresse_lzd_4) Level 4
Zajęte Tor Yvresse (poziom 4.)
(wh2_dlc15_special_settlement_tor_yvresse_lzd_4) Level 4
Zajęte Tor Yvresse (poziom 5.)
(wh2_dlc15_special_settlement_tor_yvresse_lzd_5) Level 5
Zajęte Tor Yvresse (poziom 5.)
(wh2_dlc15_special_settlement_tor_yvresse_lzd_5) Level 5
Społeczność jaszczuroludzi
(wh2_main_lzd_outpostnorsca_major_1) Level 1
Społeczność jaszczuroludzi
(wh2_main_lzd_outpostnorsca_major_1_coast) Level 1
Plac zgromadzeń jaszczuroludzi
(wh2_main_lzd_outpostnorsca_major_2) Level 2
Plac zgromadzeń jaszczuroludzi
(wh2_main_lzd_outpostnorsca_major_2_coast) Level 2
Święty ziggurat
(wh2_main_lzd_outpostnorsca_major_3) Level 3
Święty ziggurat
(wh2_main_lzd_outpostnorsca_major_3_coast) Level 3
Miasto-świątynia
(wh2_main_lzd_outpostnorsca_major_4) Level 4
Miasto-świątynia
(wh2_main_lzd_outpostnorsca_major_4_coast) Level 4
Cytadela-świątynia
(wh2_main_lzd_outpostnorsca_major_5) Level 5
Cytadela-świątynia
(wh2_main_lzd_outpostnorsca_major_5_coast) Level 5
Społeczność jaszczuroludzi
(wh2_main_lzd_outpostnorsca_minor_1) Level 1
Społeczność jaszczuroludzi
(wh2_main_lzd_outpostnorsca_minor_1_coast) Level 1
Plac zgromadzeń jaszczuroludzi
(wh2_main_lzd_outpostnorsca_minor_2) Level 2
Plac zgromadzeń jaszczuroludzi
(wh2_main_lzd_outpostnorsca_minor_2_coast) Level 2
Święty ziggurat
(wh2_main_lzd_outpostnorsca_minor_3) Level 3
Święty ziggurat
(wh2_main_lzd_outpostnorsca_minor_3_coast) Level 3
Społeczność zimnokrwistych
(wh2_main_lzd_settlement_major_1) Level 1
Społeczność zimnokrwistych
(wh2_main_lzd_settlement_major_1_coast) Level 1
Dzielnica świątynna
(wh2_main_lzd_settlement_major_2) Level 2
Dzielnica świątynna
(wh2_main_lzd_settlement_major_2_coast) Level 2
Święty ziggurat
(wh2_main_lzd_settlement_major_3) Level 3
Święty ziggurat
(wh2_main_lzd_settlement_major_3_coast) Level 3
Miasto-świątynia
(wh2_main_lzd_settlement_major_4) Level 4
Miasto-świątynia
(wh2_main_lzd_settlement_major_4_coast) Level 4
Świątynia-Ogniwo
(wh2_main_lzd_settlement_major_5) Level 5
Świątynia-Ogniwo
(wh2_main_lzd_settlement_major_5_coast) Level 5
Społeczność jaszczuroludzi
(wh2_main_lzd_settlement_minor_1) Level 1
Społeczność jaszczuroludzi
(wh2_main_lzd_settlement_minor_1_coast) Level 1
Plac zgromadzeń jaszczuroludzi
(wh2_main_lzd_settlement_minor_2) Level 2
Plac zgromadzeń jaszczuroludzi
(wh2_main_lzd_settlement_minor_2_coast) Level 2
Święty ziggurat
(wh2_main_lzd_settlement_minor_3) Level 3
Święty ziggurat
(wh2_main_lzd_settlement_minor_3_coast) Level 3
Zajęty Altdorf poziom 1
(wh2_main_special_settlement_altdorf_lzd_1) Level 1
Zajęty Altdorf poziom 2
(wh2_main_special_settlement_altdorf_lzd_2) Level 2
Zajęty Altdorf poziom 3
(wh2_main_special_settlement_altdorf_lzd_3) Level 3
Zajęty Altdorf poziom 4
(wh2_main_special_settlement_altdorf_lzd_4) Level 4
Zajęty Altdorf poziom 5
(wh2_main_special_settlement_altdorf_lzd_5) Level 5
Posterunek leśny (społeczność jaszczuroludzi)
(wh2_main_special_settlement_athel_loren_lzd_1) Level 1
Posterunek leśny (plac zgromadzeń jaszczuroludzi)
(wh2_main_special_settlement_athel_loren_lzd_2) Level 2
Posterunek leśny (święty ziggurat)
(wh2_main_special_settlement_athel_loren_lzd_3) Level 3
Posterunek leśny (miasto-świątynia)
(wh2_main_special_settlement_athel_loren_lzd_4) Level 4
Posterunek leśny (cytadela-świątynia)
(wh2_main_special_settlement_athel_loren_lzd_5) Level 5
Zajęta Czarna Grań poziom 1
(wh2_main_special_settlement_black_crag_lzd_1) Level 1
Zajęta Czarna Grań poziom 2
(wh2_main_special_settlement_black_crag_lzd_2) Level 2
Zajęta Czarna Grań poziom 3
(wh2_main_special_settlement_black_crag_lzd_3) Level 3
Zajęta Czarna Grań poziom 4
(wh2_main_special_settlement_black_crag_lzd_4) Level 4
Zajęta Czarna Grań poziom 5
(wh2_main_special_settlement_black_crag_lzd_5) Level 5
Zajęty Drakenhof poziom 1
(wh2_main_special_settlement_castle_drakenhof_lzd_1) Level 1
Zajęty Drakenhof poziom 2
(wh2_main_special_settlement_castle_drakenhof_lzd_2) Level 2
Zajęty Drakenhof poziom 3
(wh2_main_special_settlement_castle_drakenhof_lzd_3) Level 3
Zajęty Drakenhof poziom 4
(wh2_main_special_settlement_castle_drakenhof_lzd_4) Level 4
Zajęty Drakenhof poziom 5
(wh2_main_special_settlement_castle_drakenhof_lzd_5) Level 5
Niewielka zajęta elfia kolonia
(wh2_main_special_settlement_colony_major_other_1) Level 1
Mała zajęta elfia kolonia
(wh2_main_special_settlement_colony_major_other_2) Level 2
Zajęta elfia kolonia
(wh2_main_special_settlement_colony_major_other_3) Level 3
Duża zajęta elfia kolonia
(wh2_main_special_settlement_colony_major_other_4) Level 4
Kwitnąca zajęta elfia kolonia
(wh2_main_special_settlement_colony_major_other_5) Level 5
Niewielka zajęta elfia kolonia
(wh2_main_special_settlement_colony_minor_other_1) Level 1
Mała zajęta elfia kolonia
(wh2_main_special_settlement_colony_minor_other_2) Level 2
Zajęta elfia kolonia
(wh2_main_special_settlement_colony_minor_other_3) Level 3
Zajęte Couronne poziom 1
(wh2_main_special_settlement_couronne_lzd_1) Level 1
Zajęte Couronne poziom 2
(wh2_main_special_settlement_couronne_lzd_2) Level 2
Zajęte Couronne poziom 3
(wh2_main_special_settlement_couronne_lzd_3) Level 3
Zajęte Couronne poziom 4
(wh2_main_special_settlement_couronne_lzd_4) Level 4
Zajęte Couronne poziom 5
(wh2_main_special_settlement_couronne_lzd_5) Level 5
Zajęte Karak Osiem Szczytów poziom 1
(wh2_main_special_settlement_eight_peaks_lzd_1) Level 1
Zajęte Karak Osiem Szczytów poziom 2
(wh2_main_special_settlement_eight_peaks_lzd_2) Level 2
Zajęte Karak Osiem Szczytów poziom 3
(wh2_main_special_settlement_eight_peaks_lzd_3) Level 3
Zajęte Karak Osiem Szczytów poziom 4
(wh2_main_special_settlement_eight_peaks_lzd_4) Level 4
Zajęte Karak Osiem Szczytów poziom 5
(wh2_main_special_settlement_eight_peaks_lzd_5) Level 5
Zajęta Dolina Gaean (Poziom 1)
(wh2_main_special_settlement_gaean_vale_lzd_1) Level 1
Zajęta Dolina Gaean (Poziom 2)
(wh2_main_special_settlement_gaean_vale_lzd_2) Level 2
Zajęta Dolina Gaean (Poziom 3)
(wh2_main_special_settlement_gaean_vale_lzd_3) Level 3
Zajęta Dolina Gaean (Poziom 4)
(wh2_main_special_settlement_gaean_vale_lzd_4) Level 4
Zajęta Dolina Gaean (Poziom 5)
(wh2_main_special_settlement_gaean_vale_lzd_5) Level 5
Zajęta Piekielna Otchłań poziom 1
(wh2_main_special_settlement_hellpit_other_1) Level 1
Zajęta Piekielna Otchłań poziom 2
(wh2_main_special_settlement_hellpit_other_2) Level 2
Zajęta Piekielna Otchłań poziom 3
(wh2_main_special_settlement_hellpit_other_3) Level 3
Zajęta Piekielna Otchłań poziom 4
(wh2_main_special_settlement_hellpit_other_4) Level 4
Zajęta Piekielna Otchłań poziom 5
(wh2_main_special_settlement_hellpit_other_5) Level 5
Zajęte Hexoatl (poziom 1)
(wh2_main_special_settlement_hexoatl_other_lzd_1) Level 1
Zajęte Hexoatl (poziom 2)
(wh2_main_special_settlement_hexoatl_other_lzd_2) Level 2
Zajęte Hexoatl (poziom 3)
(wh2_main_special_settlement_hexoatl_other_lzd_3) Level 3
Zajęte Hexoatl (poziom 4)
(wh2_main_special_settlement_hexoatl_other_lzd_4) Level 4
Zajęte Hexoatl (poziom 5)
(wh2_main_special_settlement_hexoatl_other_lzd_5) Level 5
Zajęte Itza (plac zgromadzeń jaszczuroludzi)
(wh2_main_special_settlement_itza_other_lzd_1) Level 1
Zajęte Itza (plac zgromadzeń jaszczuroludzi)
(wh2_main_special_settlement_itza_other_lzd_2) Level 2
Zajęte Itza (święty ziggurat)
(wh2_main_special_settlement_itza_other_lzd_3) Level 3
Zajęte Itza (miasto-świątynia)
(wh2_main_special_settlement_itza_other_lzd_4) Level 4
Zajęte Itza (cytadela-świątynia)
(wh2_main_special_settlement_itza_other_lzd_5) Level 5
Zajęte Karaz-a-Karak poziom 1
(wh2_main_special_settlement_karaz_a_karak_lzd_1) Level 1
Zajęte Karaz-a-Karak poziom 2
(wh2_main_special_settlement_karaz_a_karak_lzd_2) Level 2
Zajęte Karaz-a-Karak poziom 3
(wh2_main_special_settlement_karaz_a_karak_lzd_3) Level 3
Zajęte Karaz-a-Karak poziom 4
(wh2_main_special_settlement_karaz_a_karak_lzd_4) Level 4
Zajęte Karaz-a-Karak poziom 5
(wh2_main_special_settlement_karaz_a_karak_lzd_5) Level 5
Zajęte Khemri (społeczność jaszczuroludzi)
(wh2_main_special_settlement_khemri_lzd_1) Level 1
Zajęte Khemri (plac zgromadzeń jaszczuroludzi)
(wh2_main_special_settlement_khemri_lzd_2) Level 2
Zajęte Khemri (święty ziggurat)
(wh2_main_special_settlement_khemri_lzd_3) Level 3
Zajęte Khemri (miasto-świątynia)
(wh2_main_special_settlement_khemri_lzd_4) Level 4
Zajęte Khemri (cytadela-świątynia)
(wh2_main_special_settlement_khemri_lzd_5) Level 5
Zajęty Kislev poziom 1
(wh2_main_special_settlement_kislev_lzd_1) Level 1
Zajęty Kislev poziom 2
(wh2_main_special_settlement_kislev_lzd_2) Level 2
Zajęty Kislev poziom 3
(wh2_main_special_settlement_kislev_lzd_3) Level 3
Zajęty Kislev poziom 4
(wh2_main_special_settlement_kislev_lzd_4) Level 4
Zajęty Kislev poziom 5
(wh2_main_special_settlement_kislev_lzd_5) Level 5
Zajęta Konquata (społeczność jaszczuroludzi)
(wh2_main_special_settlement_konquata_lzd_1) Level 1
Zajęta Konquata (plac zgromadzeń jaszczuroludzi)
(wh2_main_special_settlement_konquata_lzd_2) Level 2
Zajęta Konquata (święty ziggurat)
(wh2_main_special_settlement_konquata_lzd_3) Level 3
Zajęta Konquata (miasto-świątynia)
(wh2_main_special_settlement_konquata_lzd_4) Level 4
Zajęta Konquata (cytadela-świątynia)
(wh2_main_special_settlement_konquata_lzd_5) Level 5
Zajęta Lahmia (społeczność jaszczuroludzi)
(wh2_main_special_settlement_lahmia_lzd_1) Level 1
Zajęta Lahmia (plac zgromadzeń jaszczuroludzi)
(wh2_main_special_settlement_lahmia_lzd_2) Level 2
Zajęta Lahmia (święty ziggurat)
(wh2_main_special_settlement_lahmia_lzd_3) Level 3
Zajęta Lahmia (miasto-świątynia)
(wh2_main_special_settlement_lahmia_lzd_4) Level 4
Zajęta Lahmia (cytadela-świątynia)
(wh2_main_special_settlement_lahmia_lzd_5) Level 5
Zajęty Lothern poziom 1
(wh2_main_special_settlement_lothern_lzd_1) Level 1
Zajęty Lothern poziom 2
(wh2_main_special_settlement_lothern_lzd_2) Level 2
Zajęty Lothern poziom 3
(wh2_main_special_settlement_lothern_lzd_3) Level 3
Zajęty Lothern poziom 4
(wh2_main_special_settlement_lothern_lzd_4) Level 4
Zajęty Lothern poziom 5
(wh2_main_special_settlement_lothern_lzd_5) Level 5
Zajęte Miragliano poziom 1
(wh2_main_special_settlement_miragliano_lzd_1) Level 1
Zajęte Miragliano poziom 2
(wh2_main_special_settlement_miragliano_lzd_2) Level 2
Zajęte Miragliano poziom 3
(wh2_main_special_settlement_miragliano_lzd_3) Level 3
Zajęte Miragliano poziom 4
(wh2_main_special_settlement_miragliano_lzd_4) Level 4
Zajęte Miragliano poziom 5
(wh2_main_special_settlement_miragliano_lzd_5) Level 5
Złupiony Naggarond poziom 1
(wh2_main_special_settlement_naggarond_lzd_1) Level 1
Złupiony Naggarond poziom 2
(wh2_main_special_settlement_naggarond_lzd_2) Level 2
Złupiony Naggarond poziom 3
(wh2_main_special_settlement_naggarond_lzd_3) Level 3
Złupiony Naggarond poziom 4
(wh2_main_special_settlement_naggarond_lzd_4) Level 4
Złupiony Naggarond poziom 5
(wh2_main_special_settlement_naggarond_lzd_5) Level 5
Zajęta Sartosa poziom 1
(wh2_main_special_settlement_sartosa_lzd_1) Level 1
Zajęta Sartosa poziom 2
(wh2_main_special_settlement_sartosa_lzd_2) Level 2
Zajęta Sartosa poziom 3
(wh2_main_special_settlement_sartosa_lzd_3) Level 3
Zajęta Sartosa poziom 4
(wh2_main_special_settlement_sartosa_lzd_4) Level 4
Zajęta Sartosa poziom 5
(wh2_main_special_settlement_sartosa_lzd_5) Level 5
Zajęte Skavenblight poziom 1
(wh2_main_special_settlement_skavenblight_other_1) Level 1
Zajęte Skavenblight poziom 2
(wh2_main_special_settlement_skavenblight_other_2) Level 2
Zajęte Skavenblight poziom 3
(wh2_main_special_settlement_skavenblight_other_3) Level 3
Zajęte Skavenblight poziom 4
(wh2_main_special_settlement_skavenblight_other_4) Level 4
Zajęte Skavenblight poziom 5
(wh2_main_special_settlement_skavenblight_other_5) Level 5
Zajęte Przebudzenie poziom 1
(wh2_main_special_settlement_the_awakening_lzd_1) Level 1
Zajęte Przebudzenie poziom 2
(wh2_main_special_settlement_the_awakening_lzd_2) Level 2
Zajęte Przebudzenie poziom 3
(wh2_main_special_settlement_the_awakening_lzd_3) Level 3
Zajęte Przebudzenie poziom 4
(wh2_main_special_settlement_the_awakening_lzd_4) Level 4
Zajęte Przebudzenie poziom 5
(wh2_main_special_settlement_the_awakening_lzd_5) Level 5 |
|
| Garnizon Budynki | |
|---|---|
|
Zajęta piramida Nagasha (święty ziggurat)
(wh2_dlc09_special_settlement_pyramid_of_nagash_lzd_3) Level 3
Zajęta piramida Nagasha (miasto-świątynia)
(wh2_dlc09_special_settlement_pyramid_of_nagash_lzd_4) Level 4
Zajęta piramida Nagasha (cytadela-świątynia)
(wh2_dlc09_special_settlement_pyramid_of_nagash_lzd_5) Level 5
Krążel
(wh2_dlc11_special_settlement_galleons_graveyard_other_1) Level 1
Zajęte Massif Orcal (poziom 3.)
(wh2_dlc15_special_settlement_massif_orcal_lzd_3) Level 3
Zajęte Massif Orcal (poziom 4.)
(wh2_dlc15_special_settlement_massif_orcal_lzd_4) Level 4
Zajęte Massif Orcal (poziom 5.)
(wh2_dlc15_special_settlement_massif_orcal_lzd_5) Level 5
Zajęte Tor Yvresse (poziom 3.)
(wh2_dlc15_special_settlement_tor_yvresse_lzd_3) Level 3
Zajęte Tor Yvresse (poziom 4.)
(wh2_dlc15_special_settlement_tor_yvresse_lzd_4) Level 4
Zajęte Tor Yvresse (poziom 5.)
(wh2_dlc15_special_settlement_tor_yvresse_lzd_5) Level 5
Święty ziggurat
(wh2_main_lzd_outpostnorsca_major_3) Level 3
Święty ziggurat
(wh2_main_lzd_outpostnorsca_major_3_coast) Level 3
Miasto-świątynia
(wh2_main_lzd_outpostnorsca_major_4) Level 4
Miasto-świątynia
(wh2_main_lzd_outpostnorsca_major_4_coast) Level 4
Cytadela-świątynia
(wh2_main_lzd_outpostnorsca_major_5) Level 5
Cytadela-świątynia
(wh2_main_lzd_outpostnorsca_major_5_coast) Level 5
Święty ziggurat
(wh2_main_lzd_settlement_major_3) Level 3
Święty ziggurat
(wh2_main_lzd_settlement_major_3_coast) Level 3
Miasto-świątynia
(wh2_main_lzd_settlement_major_4) Level 4
Miasto-świątynia
(wh2_main_lzd_settlement_major_4_coast) Level 4
Świątynia-Ogniwo
(wh2_main_lzd_settlement_major_5) Level 5
Świątynia-Ogniwo
(wh2_main_lzd_settlement_major_5_coast) Level 5
Plac zgromadzeń jaszczuroludzi
(wh2_main_lzd_settlement_minor_2) Level 2
Plac zgromadzeń jaszczuroludzi
(wh2_main_lzd_settlement_minor_2_coast) Level 2
Zajęty Altdorf poziom 3
(wh2_main_special_settlement_altdorf_lzd_3) Level 3
Zajęty Altdorf poziom 4
(wh2_main_special_settlement_altdorf_lzd_4) Level 4
Zajęty Altdorf poziom 5
(wh2_main_special_settlement_altdorf_lzd_5) Level 5
Posterunek leśny (święty ziggurat)
(wh2_main_special_settlement_athel_loren_lzd_3) Level 3
Posterunek leśny (miasto-świątynia)
(wh2_main_special_settlement_athel_loren_lzd_4) Level 4
Posterunek leśny (cytadela-świątynia)
(wh2_main_special_settlement_athel_loren_lzd_5) Level 5
Zajęta Czarna Grań poziom 3
(wh2_main_special_settlement_black_crag_lzd_3) Level 3
Zajęta Czarna Grań poziom 4
(wh2_main_special_settlement_black_crag_lzd_4) Level 4
Zajęta Czarna Grań poziom 5
(wh2_main_special_settlement_black_crag_lzd_5) Level 5
Zajęty Drakenhof poziom 3
(wh2_main_special_settlement_castle_drakenhof_lzd_3) Level 3
Zajęty Drakenhof poziom 4
(wh2_main_special_settlement_castle_drakenhof_lzd_4) Level 4
Zajęty Drakenhof poziom 5
(wh2_main_special_settlement_castle_drakenhof_lzd_5) Level 5
Niewielka zajęta elfia kolonia
(wh2_main_special_settlement_colony_major_other_1) Level 1
Mała zajęta elfia kolonia
(wh2_main_special_settlement_colony_major_other_2) Level 2
Zajęta elfia kolonia
(wh2_main_special_settlement_colony_major_other_3) Level 3
Niewielka zajęta elfia kolonia
(wh2_main_special_settlement_colony_minor_other_1) Level 1
Mała zajęta elfia kolonia
(wh2_main_special_settlement_colony_minor_other_2) Level 2
Zajęta elfia kolonia
(wh2_main_special_settlement_colony_minor_other_3) Level 3
Zajęte Couronne poziom 3
(wh2_main_special_settlement_couronne_lzd_3) Level 3
Zajęte Couronne poziom 4
(wh2_main_special_settlement_couronne_lzd_4) Level 4
Zajęte Couronne poziom 5
(wh2_main_special_settlement_couronne_lzd_5) Level 5
Zajęte Karak Osiem Szczytów poziom 3
(wh2_main_special_settlement_eight_peaks_lzd_3) Level 3
Zajęte Karak Osiem Szczytów poziom 4
(wh2_main_special_settlement_eight_peaks_lzd_4) Level 4
Zajęte Karak Osiem Szczytów poziom 5
(wh2_main_special_settlement_eight_peaks_lzd_5) Level 5
Zajęta Dolina Gaean (Poziom 3)
(wh2_main_special_settlement_gaean_vale_lzd_3) Level 3
Zajęta Dolina Gaean (Poziom 4)
(wh2_main_special_settlement_gaean_vale_lzd_4) Level 4
Zajęta Dolina Gaean (Poziom 5)
(wh2_main_special_settlement_gaean_vale_lzd_5) Level 5
Zajęta Piekielna Otchłań poziom 3
(wh2_main_special_settlement_hellpit_other_3) Level 3
Zajęta Piekielna Otchłań poziom 4
(wh2_main_special_settlement_hellpit_other_4) Level 4
Zajęta Piekielna Otchłań poziom 5
(wh2_main_special_settlement_hellpit_other_5) Level 5
Zajęte Hexoatl (poziom 4)
(wh2_main_special_settlement_hexoatl_other_lzd_4) Level 4
Zajęte Itza (miasto-świątynia)
(wh2_main_special_settlement_itza_other_lzd_4) Level 4
Zajęte Karaz-a-Karak poziom 3
(wh2_main_special_settlement_karaz_a_karak_lzd_3) Level 3
Zajęte Karaz-a-Karak poziom 4
(wh2_main_special_settlement_karaz_a_karak_lzd_4) Level 4
Zajęte Karaz-a-Karak poziom 5
(wh2_main_special_settlement_karaz_a_karak_lzd_5) Level 5
Zajęte Khemri (święty ziggurat)
(wh2_main_special_settlement_khemri_lzd_3) Level 3
Zajęte Khemri (miasto-świątynia)
(wh2_main_special_settlement_khemri_lzd_4) Level 4
Zajęte Khemri (cytadela-świątynia)
(wh2_main_special_settlement_khemri_lzd_5) Level 5
Zajęty Kislev poziom 3
(wh2_main_special_settlement_kislev_lzd_3) Level 3
Zajęty Kislev poziom 4
(wh2_main_special_settlement_kislev_lzd_4) Level 4
Zajęty Kislev poziom 5
(wh2_main_special_settlement_kislev_lzd_5) Level 5
Zajęta Konquata (święty ziggurat)
(wh2_main_special_settlement_konquata_lzd_3) Level 3
Zajęta Konquata (miasto-świątynia)
(wh2_main_special_settlement_konquata_lzd_4) Level 4
Zajęta Konquata (cytadela-świątynia)
(wh2_main_special_settlement_konquata_lzd_5) Level 5
Zajęta Lahmia (święty ziggurat)
(wh2_main_special_settlement_lahmia_lzd_3) Level 3
Zajęta Lahmia (miasto-świątynia)
(wh2_main_special_settlement_lahmia_lzd_4) Level 4
Zajęta Lahmia (cytadela-świątynia)
(wh2_main_special_settlement_lahmia_lzd_5) Level 5
Zajęty Lothern poziom 3
(wh2_main_special_settlement_lothern_lzd_3) Level 3
Zajęty Lothern poziom 4
(wh2_main_special_settlement_lothern_lzd_4) Level 4
Zajęty Lothern poziom 5
(wh2_main_special_settlement_lothern_lzd_5) Level 5
Zajęte Miragliano poziom 3
(wh2_main_special_settlement_miragliano_lzd_3) Level 3
Zajęte Miragliano poziom 4
(wh2_main_special_settlement_miragliano_lzd_4) Level 4
Zajęte Miragliano poziom 5
(wh2_main_special_settlement_miragliano_lzd_5) Level 5
Złupiony Naggarond poziom 3
(wh2_main_special_settlement_naggarond_lzd_3) Level 3
Złupiony Naggarond poziom 4
(wh2_main_special_settlement_naggarond_lzd_4) Level 4
Złupiony Naggarond poziom 5
(wh2_main_special_settlement_naggarond_lzd_5) Level 5
Zajęta Sartosa poziom 3
(wh2_main_special_settlement_sartosa_lzd_3) Level 3
Zajęta Sartosa poziom 4
(wh2_main_special_settlement_sartosa_lzd_4) Level 4
Zajęta Sartosa poziom 5
(wh2_main_special_settlement_sartosa_lzd_5) Level 5
Zajęte Skavenblight poziom 3
(wh2_main_special_settlement_skavenblight_other_3) Level 3
Zajęte Skavenblight poziom 4
(wh2_main_special_settlement_skavenblight_other_4) Level 4
Zajęte Skavenblight poziom 5
(wh2_main_special_settlement_skavenblight_other_5) Level 5
Zajęte Przebudzenie poziom 3
(wh2_main_special_settlement_the_awakening_lzd_3) Level 3
Zajęte Przebudzenie poziom 4
(wh2_main_special_settlement_the_awakening_lzd_4) Level 4
Zajęte Przebudzenie poziom 5
(wh2_main_special_settlement_the_awakening_lzd_5) Level 5 |
|
|
Plac zgromadzeń jaszczuroludzi
(wh2_main_lzd_outpostnorsca_minor_2) Level 2
Plac zgromadzeń jaszczuroludzi
(wh2_main_lzd_outpostnorsca_minor_2_coast) Level 2
Święty ziggurat
(wh2_main_lzd_settlement_minor_3) Level 3
Święty ziggurat
(wh2_main_lzd_settlement_minor_3_coast) Level 3
Duża zajęta elfia kolonia
(wh2_main_special_settlement_colony_major_other_4) Level 4
Kwitnąca zajęta elfia kolonia
(wh2_main_special_settlement_colony_major_other_5) Level 5 |
|
|
Wielki fort
(wh2_main_special_empire_fort_untainted_3) Level 3
Imponujący fort
(wh2_main_special_empire_fort_untainted_4) Level 4
Niezdobyty fort
(wh2_main_special_empire_fort_untainted_5) Level 5
Wielka brama fortecy
(wh2_main_special_fortress_gate_eagle_untainted_3) Level 3
Imponująca brama fortecy
(wh2_main_special_fortress_gate_eagle_untainted_4) Level 4
Niezdobyta brama fortecy
(wh2_main_special_fortress_gate_eagle_untainted_5) Level 5
Wielka brama fortecy
(wh2_main_special_fortress_gate_griffon_untainted_3) Level 3
Imponująca brama fortecy
(wh2_main_special_fortress_gate_griffon_untainted_4) Level 4
Niezdobyta brama fortecy
(wh2_main_special_fortress_gate_griffon_untainted_5) Level 5
Wielka brama fortecy
(wh2_main_special_fortress_gate_phoenix_untainted_3) Level 3
Imponująca brama fortecy
(wh2_main_special_fortress_gate_phoenix_untainted_4) Level 4
Niezdobyta brama fortecy
(wh2_main_special_fortress_gate_phoenix_untainted_5) Level 5
Wielka brama fortecy
(wh2_main_special_fortress_gate_unicorn_untainted_3) Level 3
Imponująca brama fortecy
(wh2_main_special_fortress_gate_unicorn_untainted_4) Level 4
Niezdobyta brama fortecy
(wh2_main_special_fortress_gate_unicorn_untainted_5) Level 5
Zajęte Hexoatl (poziom 2)
(wh2_main_special_settlement_hexoatl_other_lzd_2) Level 2
Zajęte Hexoatl (poziom 3)
(wh2_main_special_settlement_hexoatl_other_lzd_3) Level 3
Zajęte Hexoatl (poziom 5)
(wh2_main_special_settlement_hexoatl_other_lzd_5) Level 5
Zajęte Itza (plac zgromadzeń jaszczuroludzi)
(wh2_main_special_settlement_itza_other_lzd_2) Level 2
Zajęte Itza (święty ziggurat)
(wh2_main_special_settlement_itza_other_lzd_3) Level 3
Zajęte Itza (cytadela-świątynia)
(wh2_main_special_settlement_itza_other_lzd_5) Level 5 |
|
| Frakcje z dostępem | |
|---|---|
| Oko Wiru | |
| Total War: WARHAMMER II |
|---|
|
Total War: WARHAMMER II |
| Frakcje |
| Jednostki |
| Własna bitwa Jednostki |
| Budynki |
| Technologia |
| Umiejętności |
| Armie |
| Porównaj Jednostki |
| Duch Dżungli Jednostki |
|---|
| Dowództwo (7) |
| Piechota do walki w zwarciu (31) |
22. |
25. |
27. |
28. |
| Piechota dystansowa (10) |
46. |
| Jazda do walki w zwarciu (4) |
| Jazda dystansowa (3) |
| Jazda szturmowa (3) |
56. |
57. |
Factions
Units
Units in Custom Battle
Buildings
Technologies
Household
Regions
Mercenaries
Total War: Rome II
Factions
Units
Auxiliary Corps
Units in Custom Battle
Buildings
Technologies
Household
Regions
Mercenaries
Total War: Rome II: MODs
Radious Total War Mod
Divide et Impera
Total War: Rome II: ICONs
BullGod's Unit Icons
Normal's Rome II_Units Icons
Factions
Units
Shogun 2: Rise of the Samurai
Shogun 2: Fall of the Samurai
Napoleon: Total War
Factions
Units
Empire: Total War
Factions
Units
Factions
Units
Army
Buildings
Mercenaries
Retinue
Traits
Regions
Ranking
Medieval II: Total War: Kingdoms
Medieval II - Americas
Medieval II - Britannia
Medieval II - Crusades
Medieval II - Tutonic
Broken Crescent 1.05
Broken Crescent 2.02
Stainless Steel 5.1b
Stainless Steel 6.1
Deus Lo Vult 5.7
Deus Lo Vult 6.0
HTF: Eagle of the Elbe 05
The Long Road 2.0
Lands to Conquer Gold
DarthMod 1.4D: The Last Episode
Das Heilige Romische Reich 06
Third Age 1.3
Third Age 1.4
Third Age 2.1
Third Age 3.1